My Photovoltaic Project
By Bill Westphal - WB6YPF
I had been toying with the idea of powering my radios with batteries charged by solar energy for quite some time. I wanted to have a self sufficient power source for emergency situations. There are other environmental advantages to Solar Power of course. Saving a little money on electricity didn’t seem like a big selling point since the cost of Solar (photovoltaic) equipment isn’t that cheap.
It wasn’t until a friend gave me a solar panel and some other components that I finally decided to do it. I scraped together the money to buy a second solar panel and the rest of the components. It surprisingly coincided with the latest episode of stage 2 and stage 3 power alerts we have all been subjected to here in Southern California.
It was a fun project and I thought I would share it with others who may be interested. Here are some photos and text that describes my Photovoltaic System.
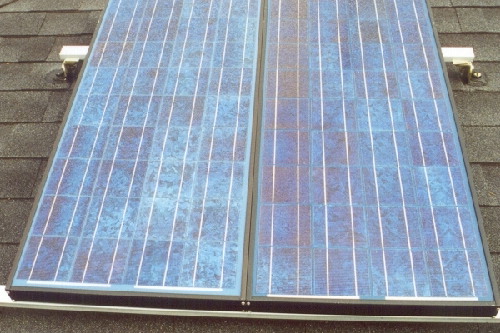
The Solar Panels
The Solar Panels (photovoltaic modules) are MSX-60’s , manufactured by Solarex. They are rated at 60 Watts each. They produce an Open Circuit Voltage of 21.1 Volts DC. Each panel will produce a maximum current output of 3.5 Amps. I am using two panels wired in parallel and have measured 7.0 Amps at maximum sunlight. These panels are nice because they produce a slightly higher Voltage than other panels. The Output Voltage from Solar Panels tends to drop at high temperatures. I thought this would be an advantage on hot summer days with the panels mounted on a dark gray roof. The Solar Array is wired to the controller with 10 AWG wire.
These Solarex panels are extremely sturdy. During assembly of the panels, I had bolted the two of them together on aluminum unistrut. I had them propped up against a wall when they were inadvertently knocked over and fell face first, flat on my concrete driveway. After I regained consciousness, I was shocked to discover that they both still performed as advertised. Is that amazing or what?
Ideally, for maximum performance, the solar panels should face south (at least for those of us in the Northern Hemisphere). They should be mounted at an angle calculated by taking the Latitude of your location and adding 15. I calculated 34 degrees Latitude plus fifteen for a final mounting angle of approximately 49 degrees. I tried this but decided to mount the solar panels flush on the roof for cosmetic reasons. They ended up facing south at an angle of approximately 25 degrees. I still get 7.0 Amps in full sun and they seem to be performing well.
You can expect to pay around $5.00 per Watt when buying Solar Panels depending on the size and manufaturer.
The Controller
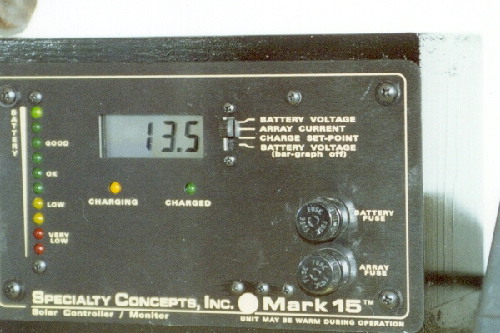
The controller is a Mark 15 manufactured by Specialty Concepts Inc. This device regulates the voltage and charges the batteries. The controller will handle a maximum of 15 Amps. Once the batteries reach a "Charge Set Point" the controller stops charging and monitors the batteries. The controller also blocks current from flowing back into the Solar Panels when the sun goes down.
The controller has a LCD display and a switch which allows you to monitor Battery voltage, Current from the Solar Array and the Charge Set Point. It also has LED’s which give a graphical display of the battery condition and whether the batteries are charged or charging. When the batteries are near full charge, the controller will "pulse charge" the batteries. This is designed to maintain the health of the batteries and prolong their life.
A Charge Controller of this type would cost somewhere around $100.
The Batteries
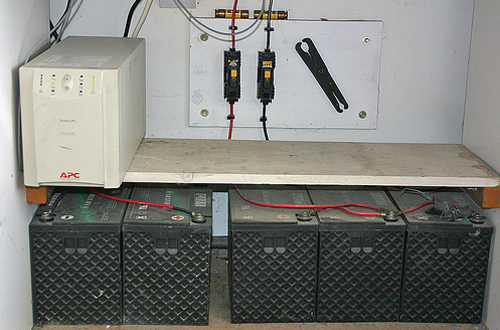
The batteries are Marathon 90AmpereHour Sealed Valve Regulated Lead Acid Batteries. They are constructed with an absorbent glass mat and are valve regulated. When operated at the recommended float voltage and temperature, they emit virtually no gas or acid mist and do not require ventilation.
The batteries are rated at 90 AH each. The three batteries on the right are connected to the Solar Panels. I am using three of them strapped in parallel. The two batteries on the left provide backup power for the APC XL1000 24Volt UPS which powers the WeatherCam and Computer. Both the positive and negative leads are fused with 60 Amp cartridge type fuses for short circuit protection. They also provide a means of isolating the batteries for maintenance.
Batteries can cost anywhere from about $65 and up depending on the type and manufacturer of the battery. Deep cycle/Marine batteries would work well for this purpose and are readily available. There are lots of choices available.
Fuse Distribution
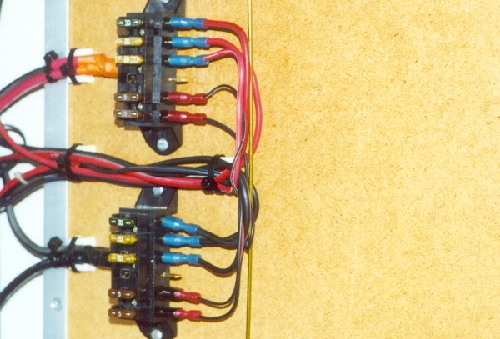
I chose these fuse blocks used for automotive type knife fuses since the fuse block had a compression fitting on the bus side which would accept the 6 AWG wire I was running from the batteries. The leads from the controller to the batteries connects on the bus side also.
The distribution side uses common .25" push on connectors. I chose to use a fuse block on the negative side also. Not for protection but so I could use the same type of connectors on both the positive and negative leads from my radios.
These types of parts are available at electronics parts houses such as Dow Marvac and are fairly inexpensive.
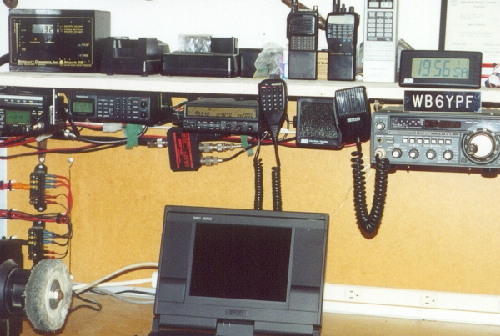
The Radios
The Photovoltaic System currently supports a Kenwood TM-642A Transceiver on 144 MHz, 220 MHz and 1.2 GHz FM voice. A Yaesu FT-707 HF Transceiver and a Radio Shack PRO-2067 Scanner.
I haven’t got my laptop computer powered by the Photovoltaic System yet but it will be eventually.
Feel free to E-MAIL ME with questions or comments.
Bill Westphal – WB6YPF
References:
Solarex: Frederick, MD. 301-698-4200 http://www.solarex.com
Specialty Concepts: Chatsworth, CA. 818-998-5238
C&D Technologies: Blue Bell, PA. 800-543-8630 http://www.cdtechno.com